Uploading Worker Credentials
Quick Tips
- Worker credentials can be uploaded by any User on the company account with an Admin or Manager role. A Worker may upload their credential(s) directly via the worker portal.
- The response time for the verification of newly submitted credentials is typically within 3 business days.
- Once a document has been uploaded as a credential, it cannot be deleted.
Quick Navigation
Log in > MY TEAM > WORKERS > Worker name > Credentials tab > 'Required' credential > Upload > enter Document Details > Save
or
Log in > MY TEAM > WORKERS > Worker name > Credentials tab > 'Not accepted' credential > Replace > update Document Details > Save
or
Log in > MY TEAM > WORKERS > Worker name > Credentials tab > + Add a credential > Select document title > Upload > enter Document Details > Save
Uploading a Worker's Credential
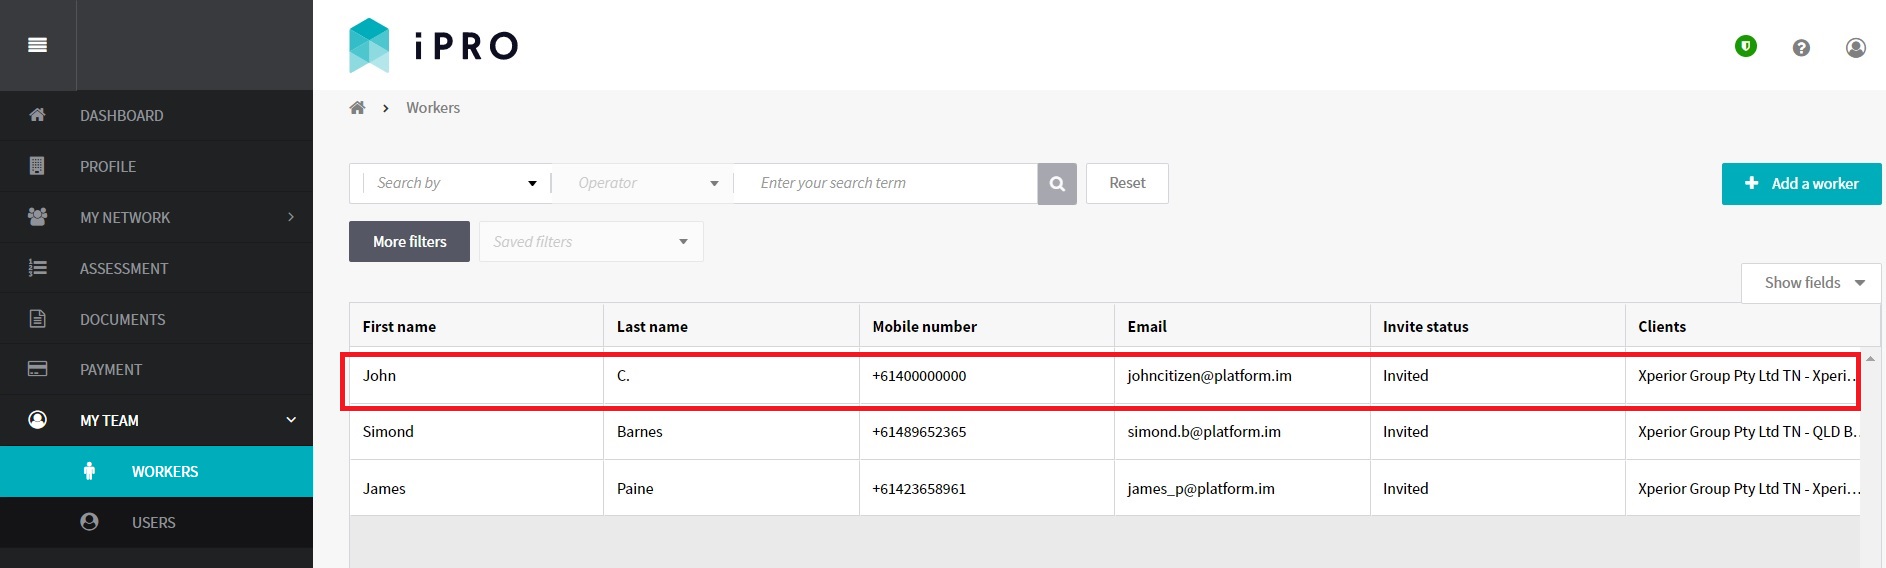
- Click MY TEAM in the left hand side menu.
- Select WORKERS - a list of the workers will be displayed.
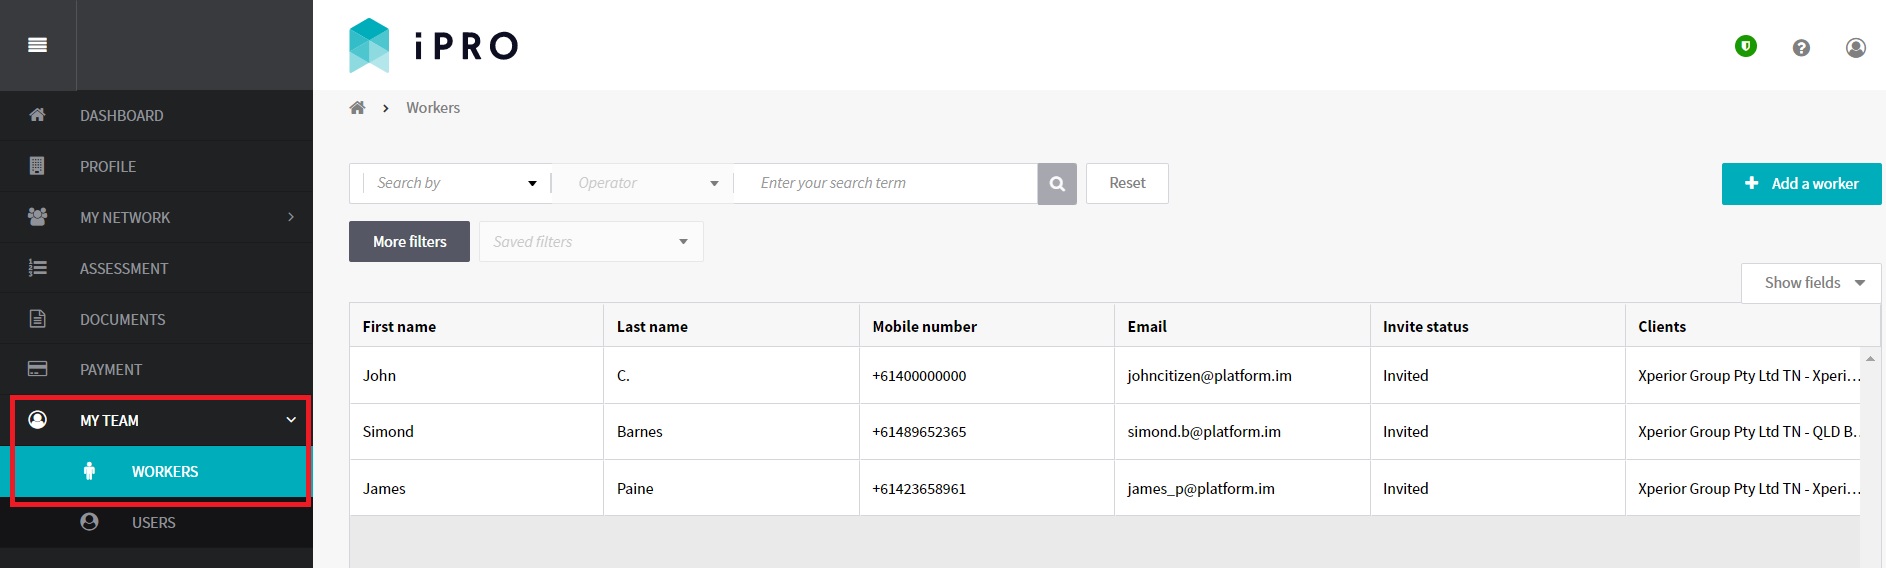
- Click on the worker for whom the credentials are required to be uploaded. Use the search filters appearing at the top of the Workers list to find the worker quickly.

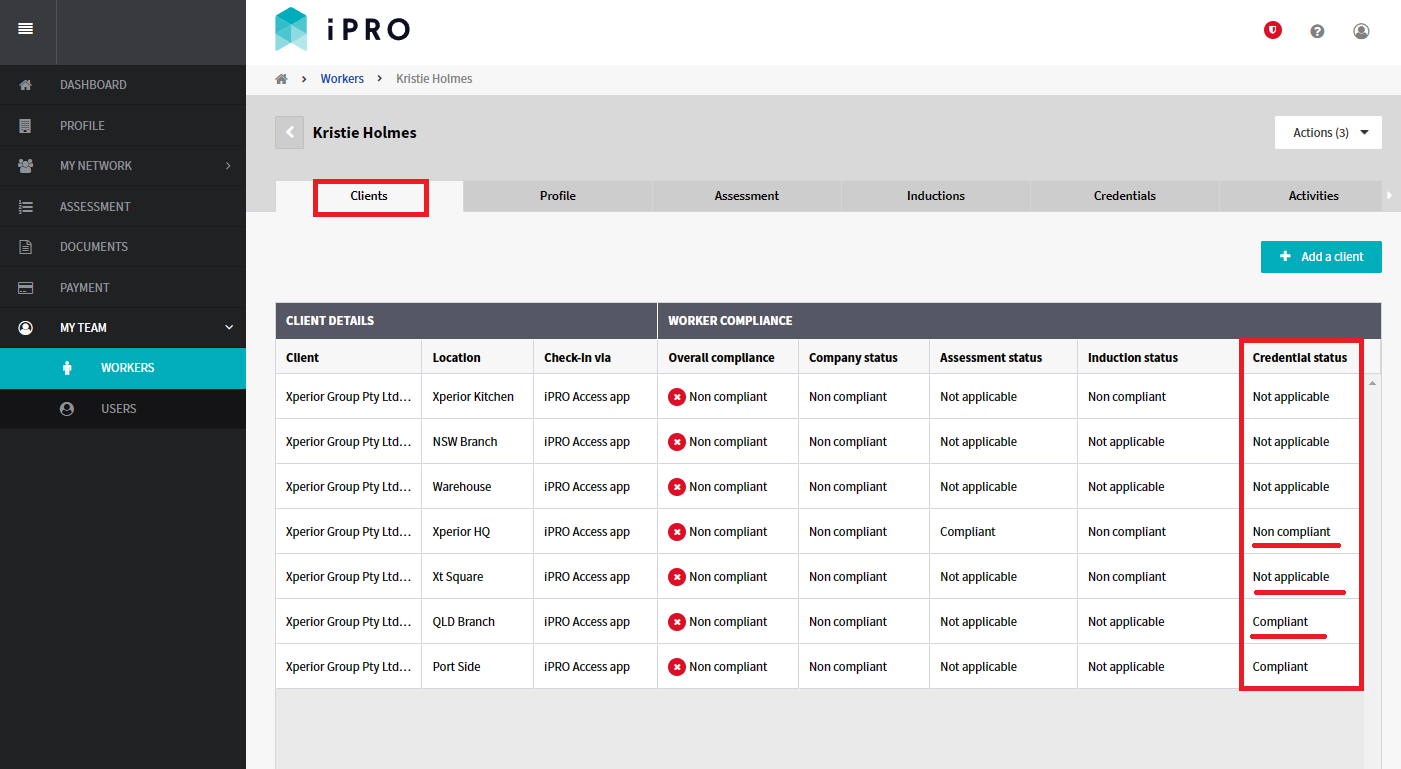
You will be redirected to the worker's compliance summary, displayed within the Clients tab, where the credential's status is displayed. To understand a credential's status to determine the requirement, refer to the table below titled Explanation of a Credential's Requirement Status below.Notes:
(a) The worker must be connected to a client and its location (if applicable) in order to determine if a credential is a compliance requirement. For more information, refer: Managing a Worker's Client Connections.
(b) As some worker assessments drive the credential requirements, it is important that the worker assessment is completed prior to uploading the worker's credentials (if any). For more information, refer: Completing a Worker Assessment.


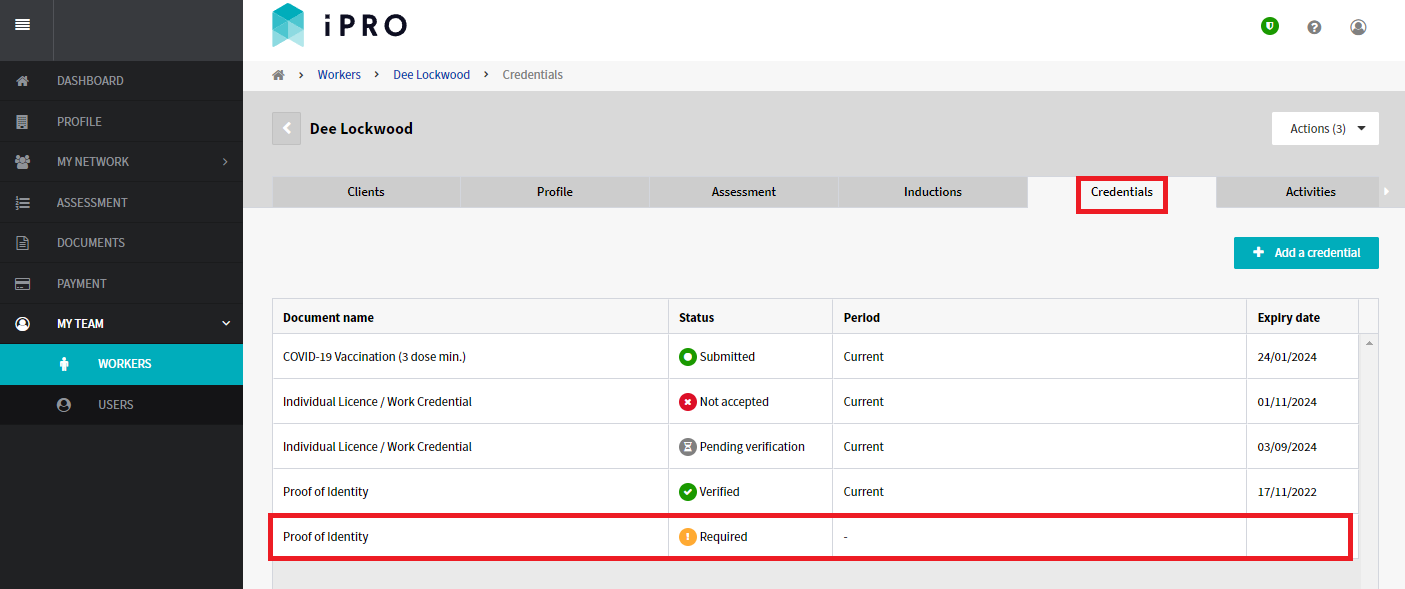
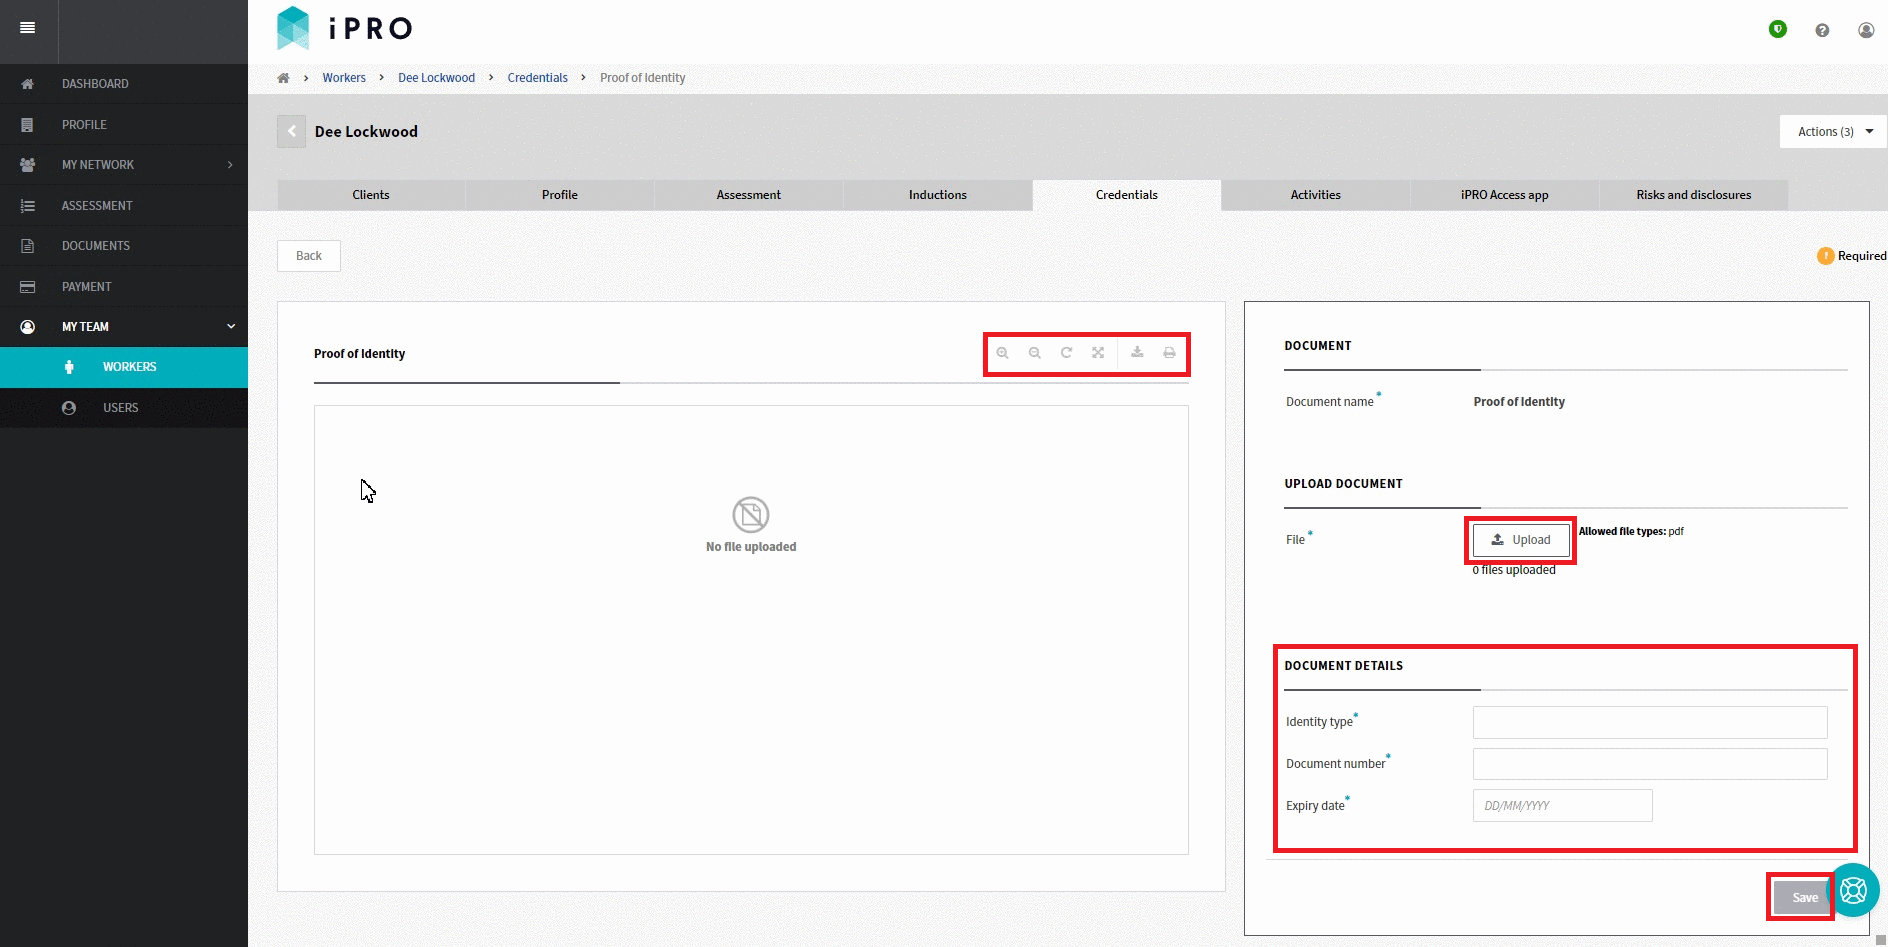
- Click the Credentials tab to view the list of credentials with their respective status. Click on the Required credential. You will be redirected to the credential's details page, where you can upload the document and enter its details.
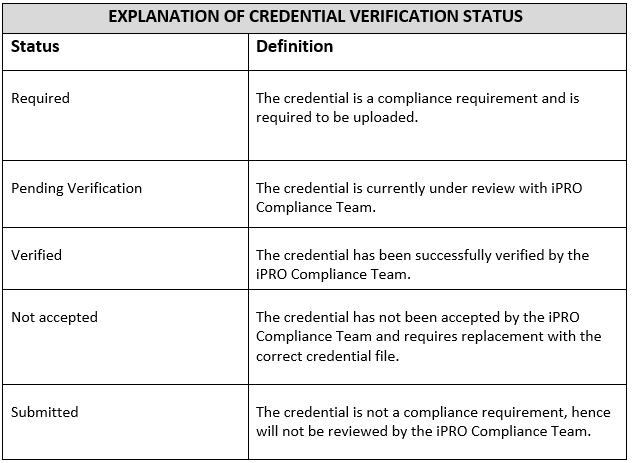
To understand a credential's verification status, refer to the table titled Explanation of a Credential's Verification Status below.
Note: A credential may also be uploaded by clicking the + Add a credential button, located within the Credentials tab.


- Click the Upload button, then navigate to the applicable document for uploading; a preview of the document will appear in the left hand panel (tip: use the control icons to enlarge, reduce, rotate, download, or print the document).
Complete the DOCUMENT DETAILS fields, and then click the Save button to submit the document for verification. All fields marked with an asterisk (*) are mandatory.
Note: the DOCUMENT DETAILS fields will differ depending on the credential being uploaded.
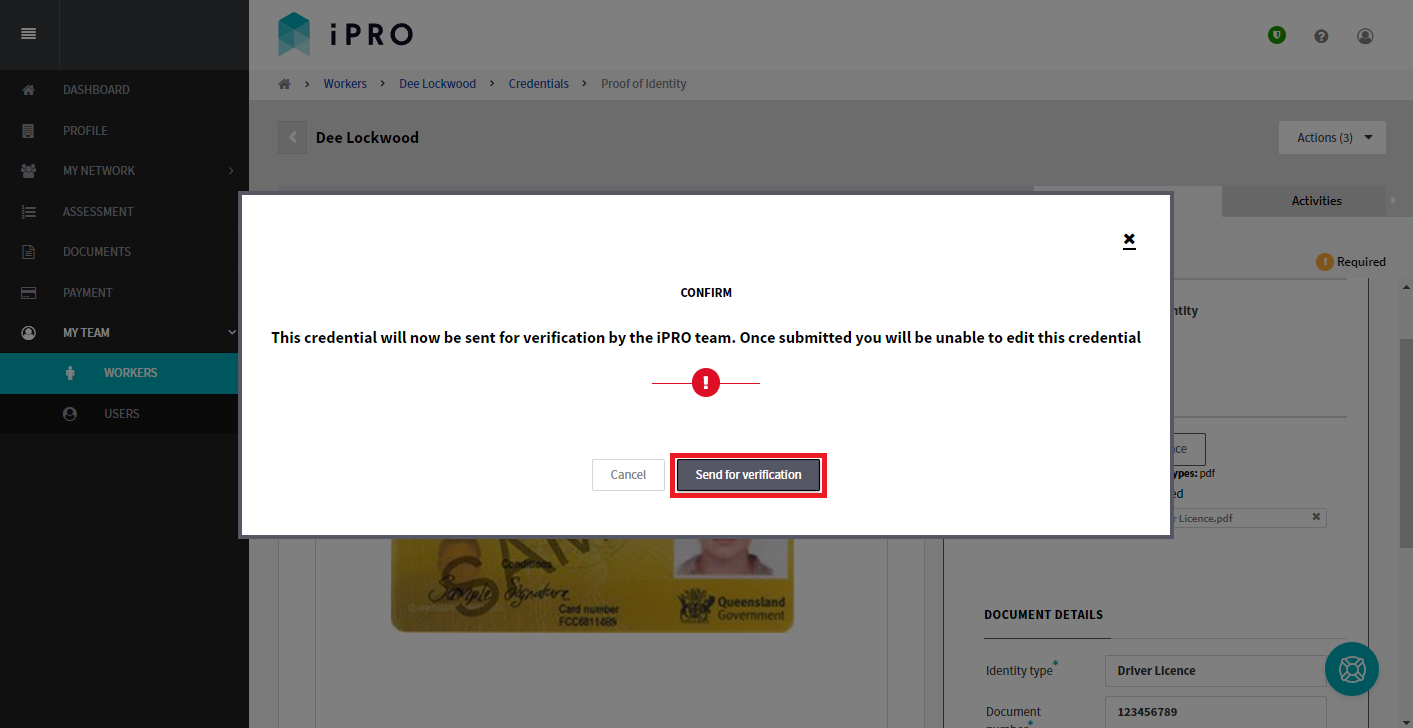
- When presented with the confirmation, click the Send for verification button to submit the credential for verification.
Upon successful verification, the status of the credential will change to Verified.
Upon unsuccessful verification, the status of the credential will change to Not accepted.
The outcome of the verification for an Employer Managed worker will be emailed to the Admin User/s who have their 'send notification' enabled. Self Managed workers will be emailed the outcome to their registered email id.

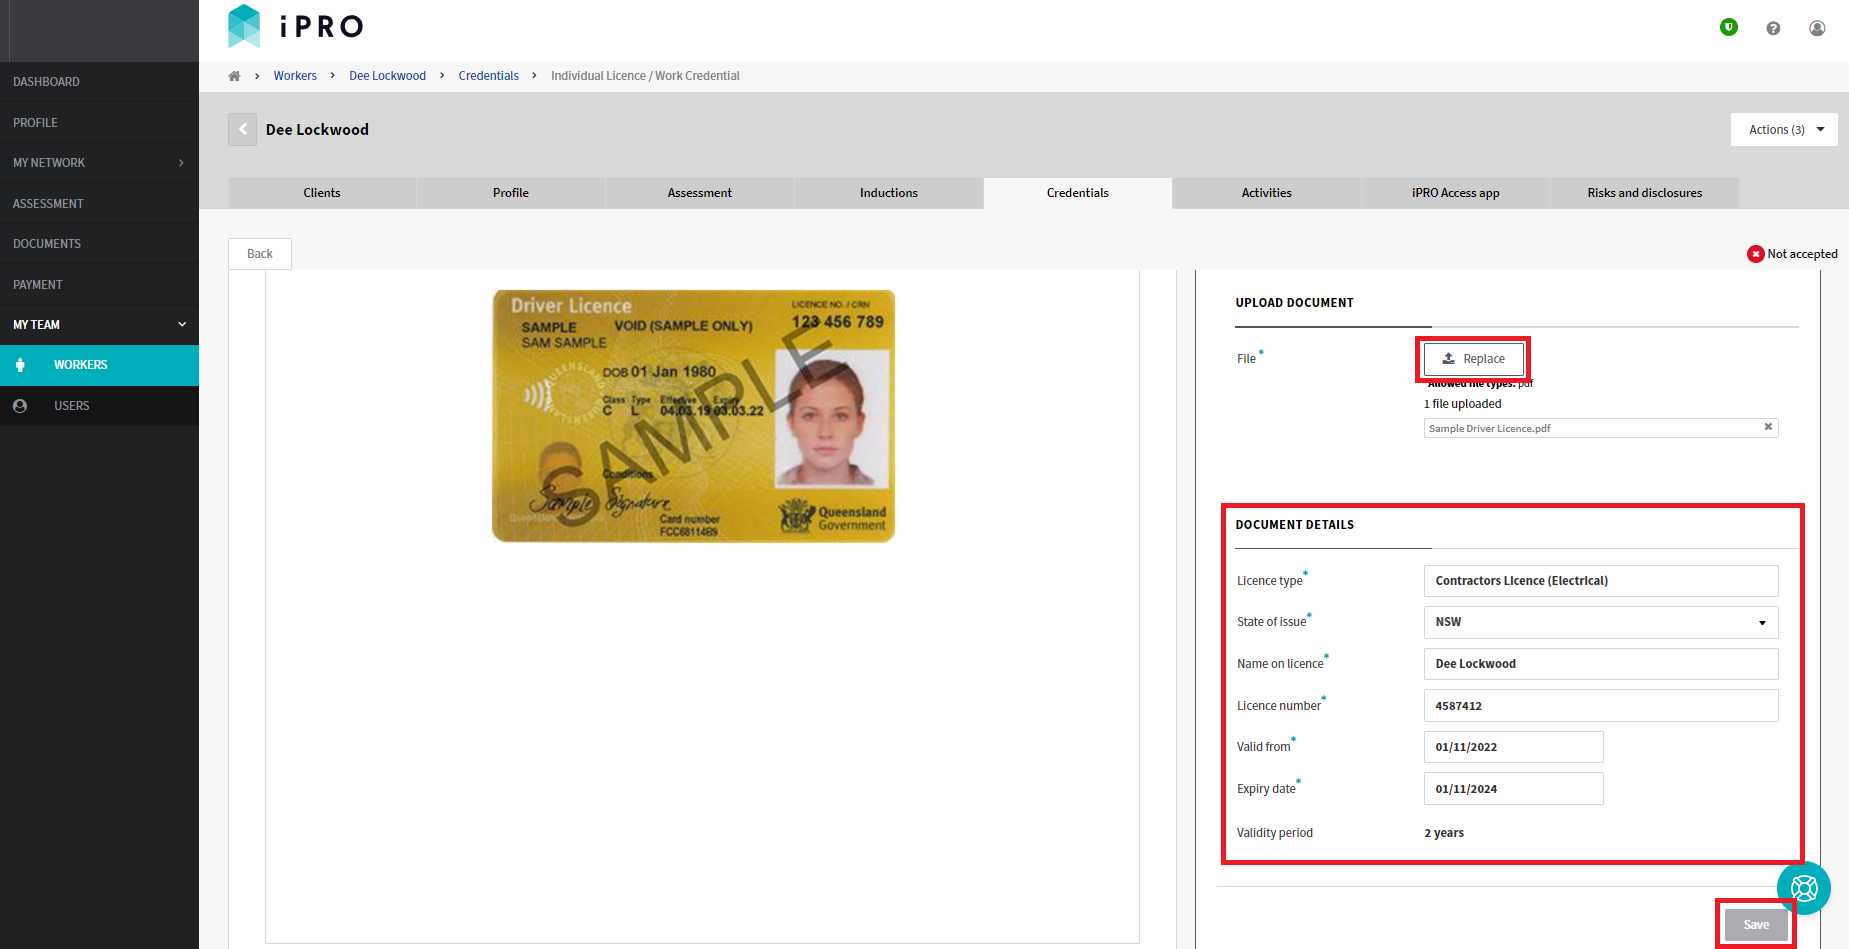
Replacing a 'not accepted' credential
To replace an existing credential that has been marked as Not accepted, click on the applicable credential, and then click the Replace button. Navigate to the applicable document for uploading; a preview of the document will appear in the left hand panel. Update the DOCUMENT DETAILS fields (if applicable), and then click the Save button to submit the document for verification.