Checking-in Workers Manually at a Location
Quick Tips
- Workers can be manually checked-in at a location where the iPRO Access mobile app is required to be used.
- Manual check-in can be used when:
- the worker is compliant but is unable to use the iPRO Access app to check-in due to internet connectivity issues or an outdated operating system.
- the worker is non compliant. Client users can review the reason for non-compliance, and if acceptable, provide a reason for the override and check-in the worker.
- A not permitted check-in attempt can be overridden by a user within 2 hours of the check in attempt.
Quick Navigation:
Log in > Locations > Activity > Manual check-in > Find the location > Find the worker > Check-in Worker
or
Log in > Locations > All locations > Find the location > Manual Check-in > Find the worker > Check-in Worker
Checking-in workers manually
A worker can be manually checked-in from the:
- Activity page (Locations > Activity > Manual Check-in): This option will require you to first select a location, and then select a worker to manually check-in.
- Individual location page (Locations > All Locations > Find and click on a location > Manual Check-in): This option will require you to find and select a worker who is to be manually checked-in at the selected location.
Checking in a worker manually from the Activity page:
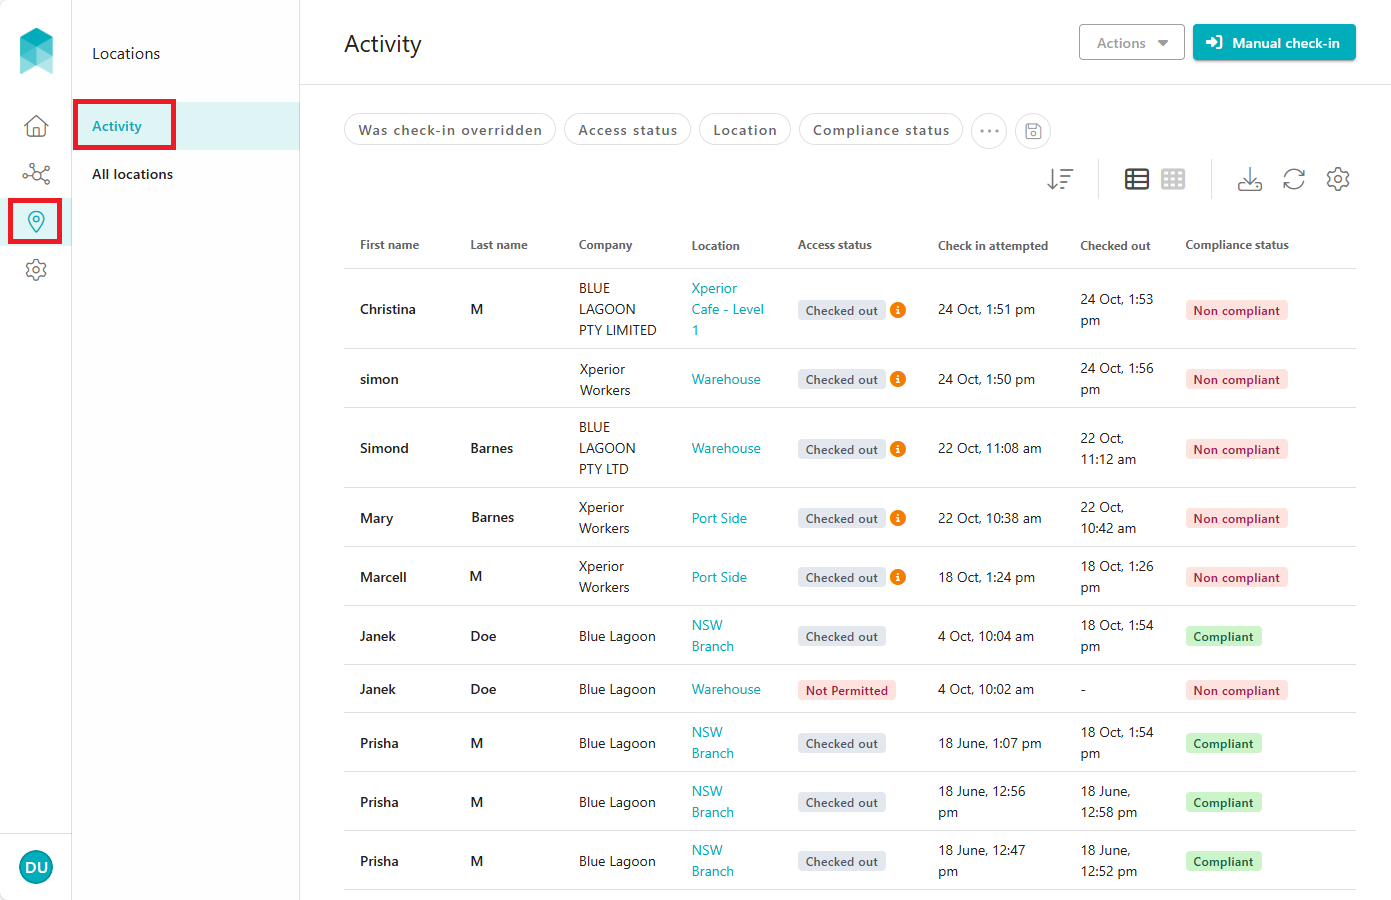
- Click Locations: A list of all the activities across all locations will appear.
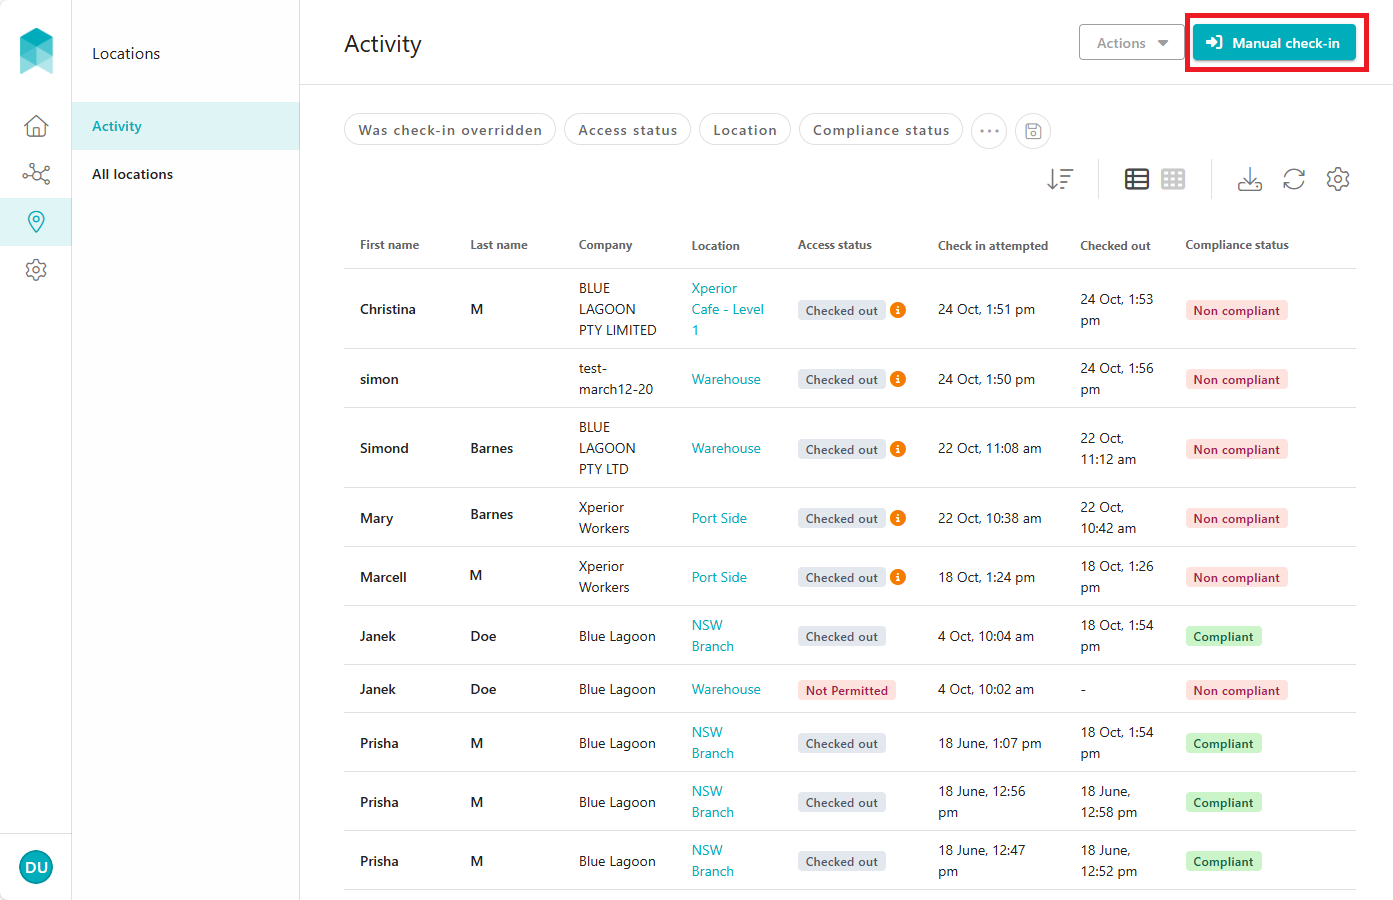
- Click Manual Check-in.
- Find the location where the worker is to be manually checked-in by entering the location name and selecting from the results listed.
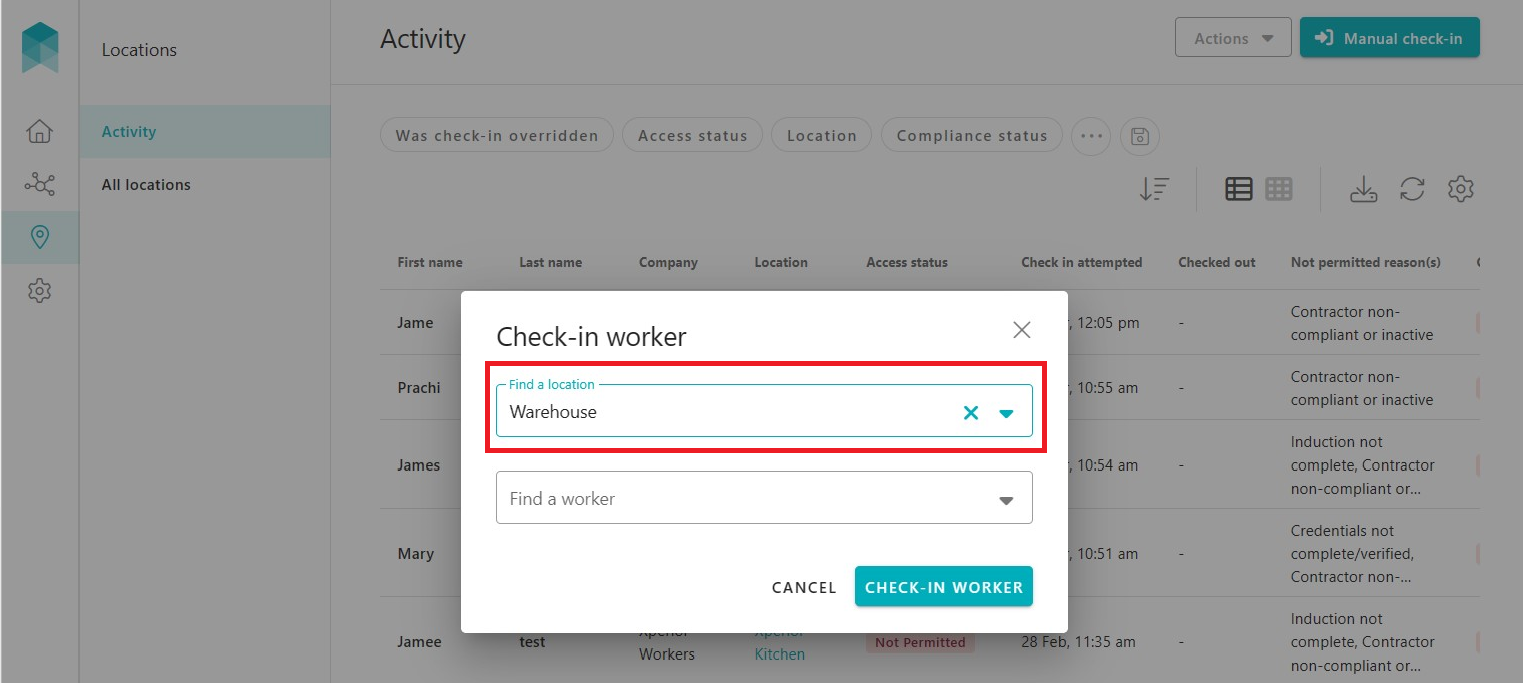
- Find the worker who is required to be manually checked-in by entering the worker's name, and then click CHECK-IN WORKER. A notification of successful check-in will appear with an option to view details.

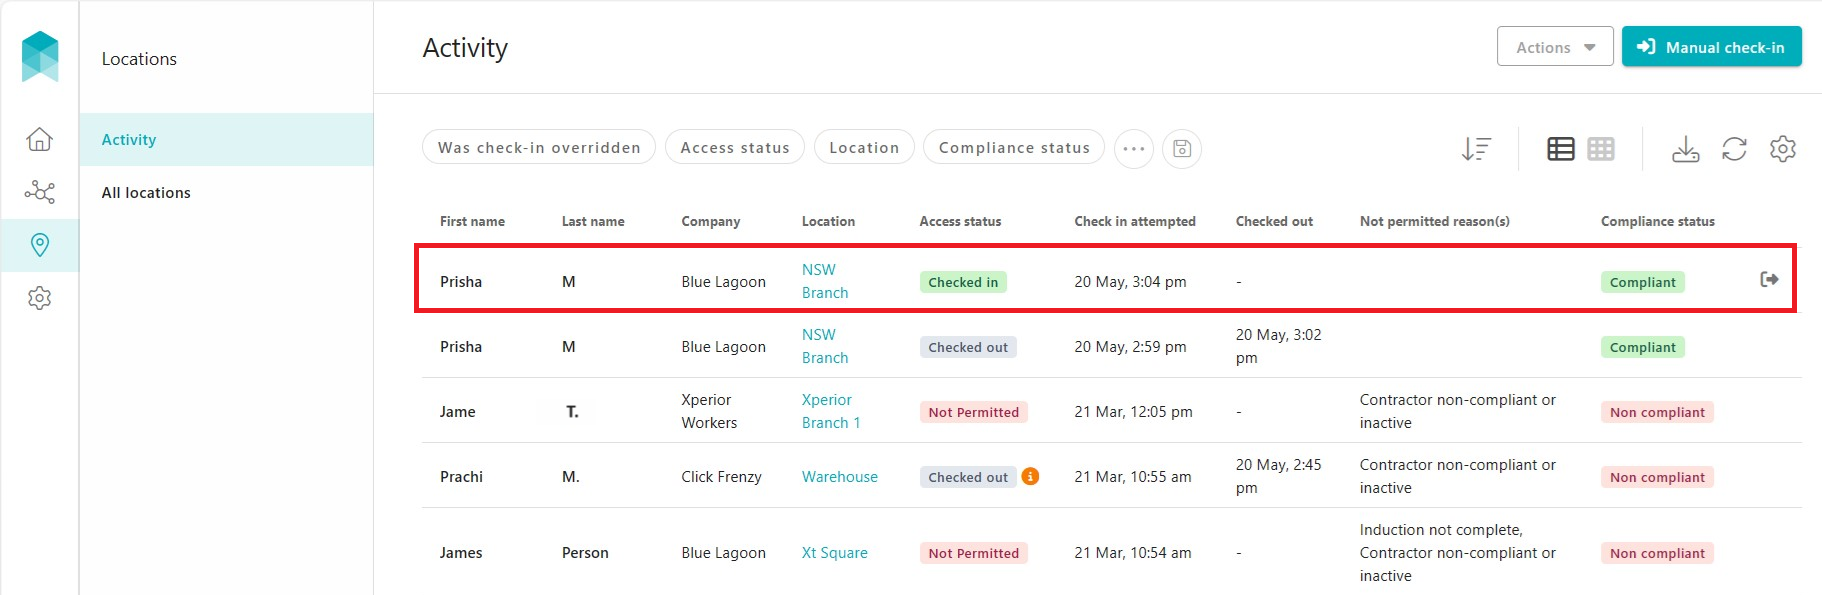
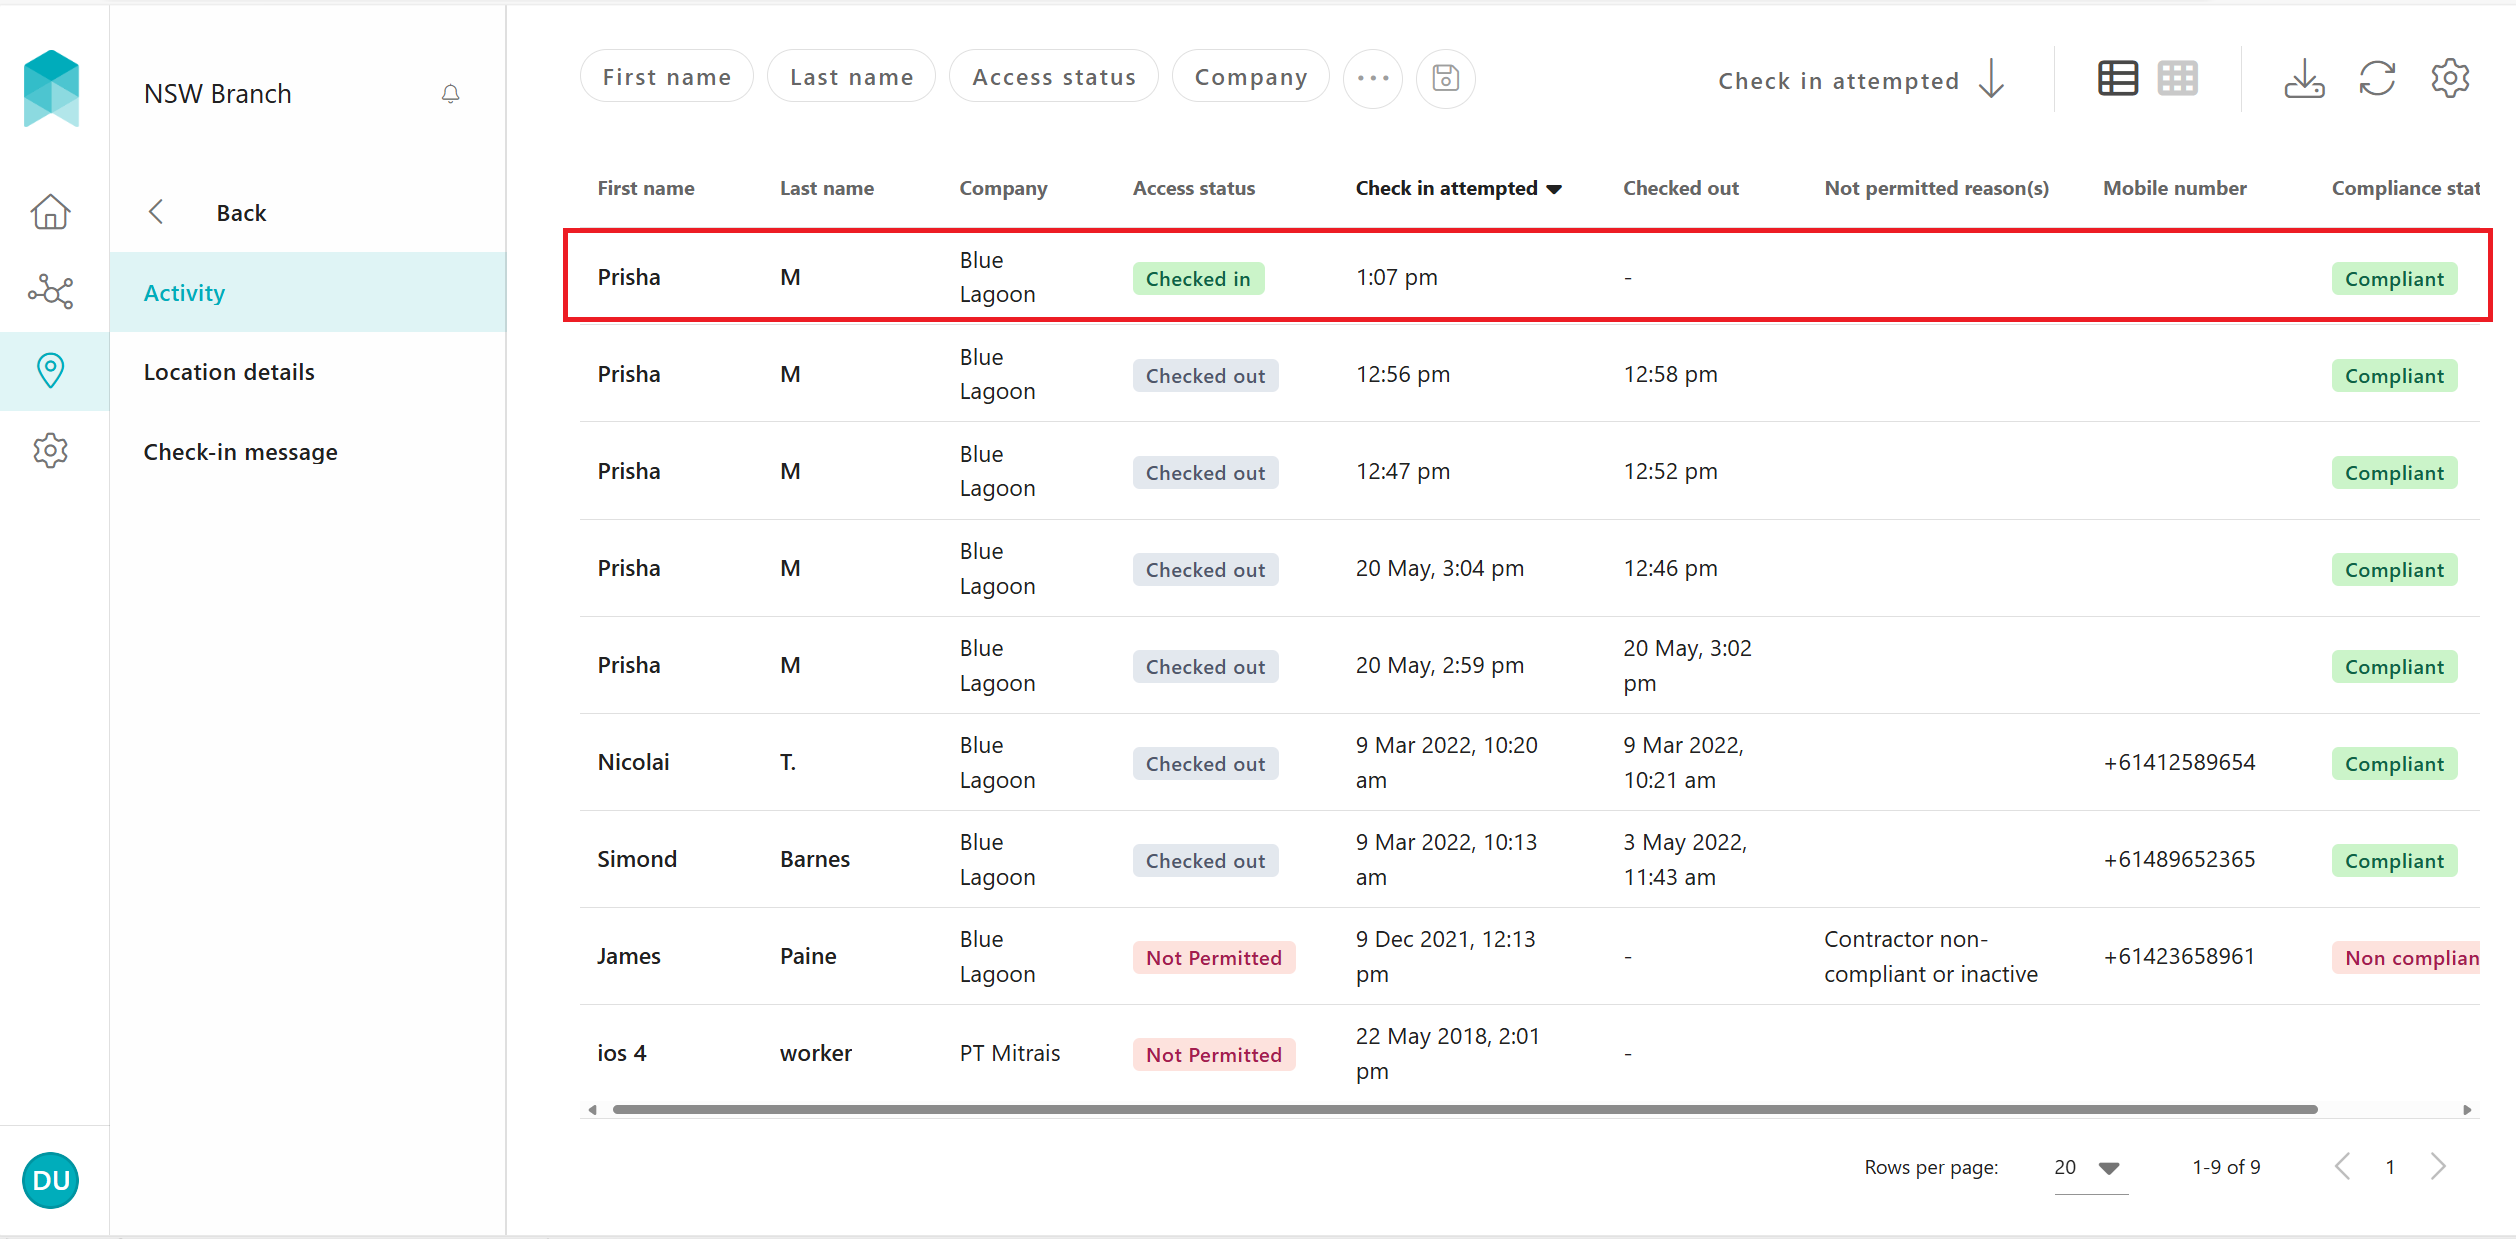
The Activity page will be updated to indicate the successful check-in of the worker.


Checking in manually from the individual location page:
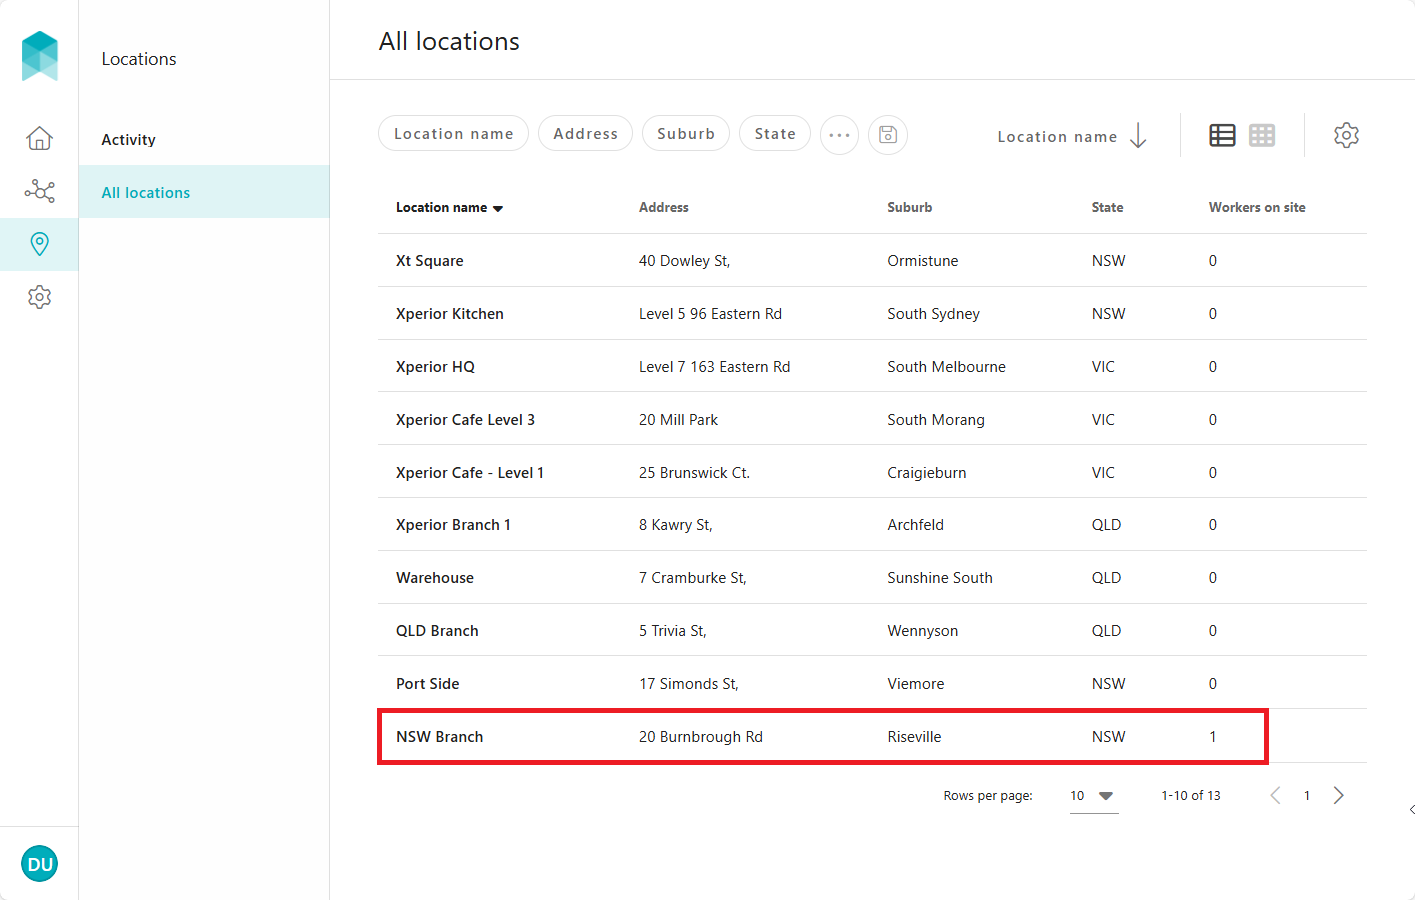
- Click Locations and then click All locations. A list of locations configured for worker check-in will appear.
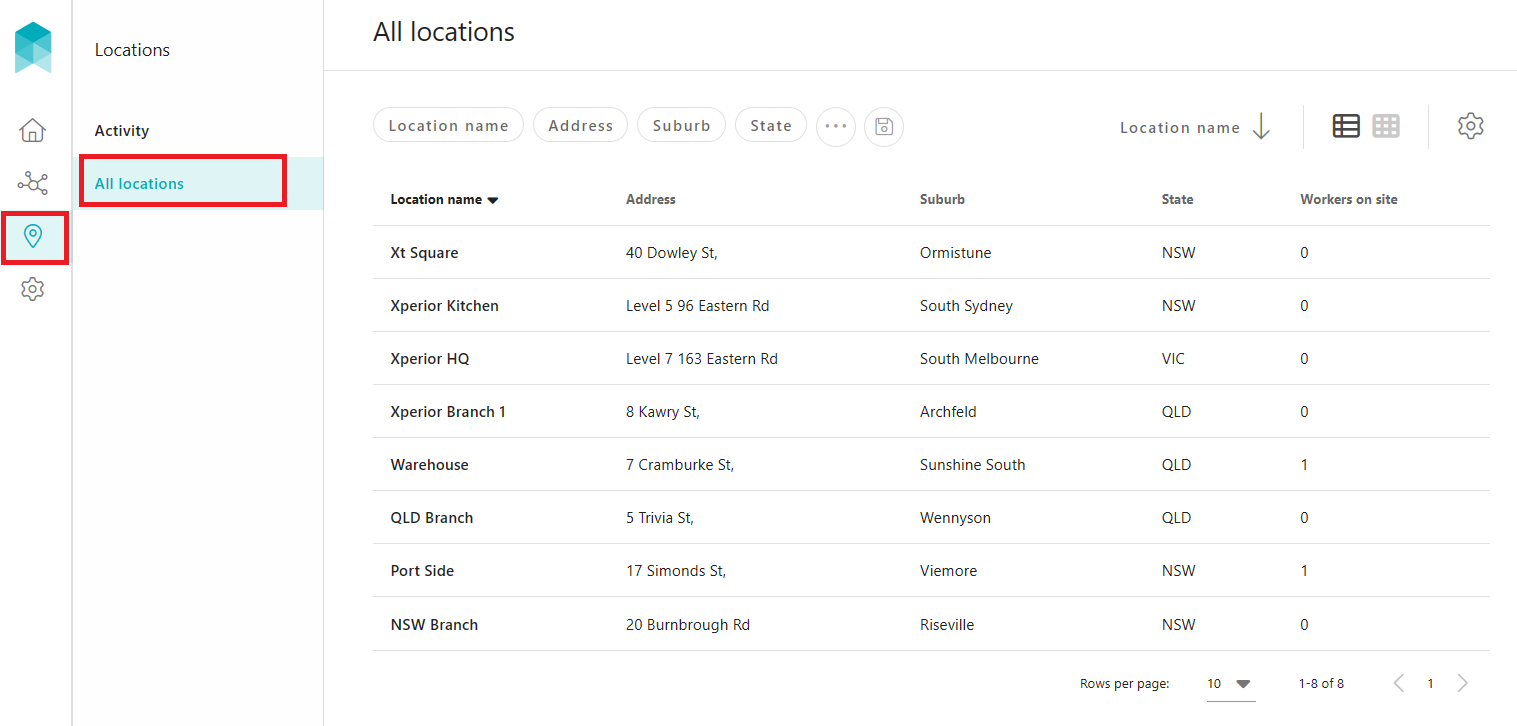
- Find and click the location where the worker is to be checked-in. Use the search filters available at the top of the list to find the location quickly.
- Click Manual Check-in. Find and select the worker who is to be checked-in by entering the worker's name, and then click CHECK-IN WORKER. A notification of successful check-in will appear with an option to view details.

The Activity page will be updated to indicate the successful check-in of the worker.


Overriding a not-permitted check-in:
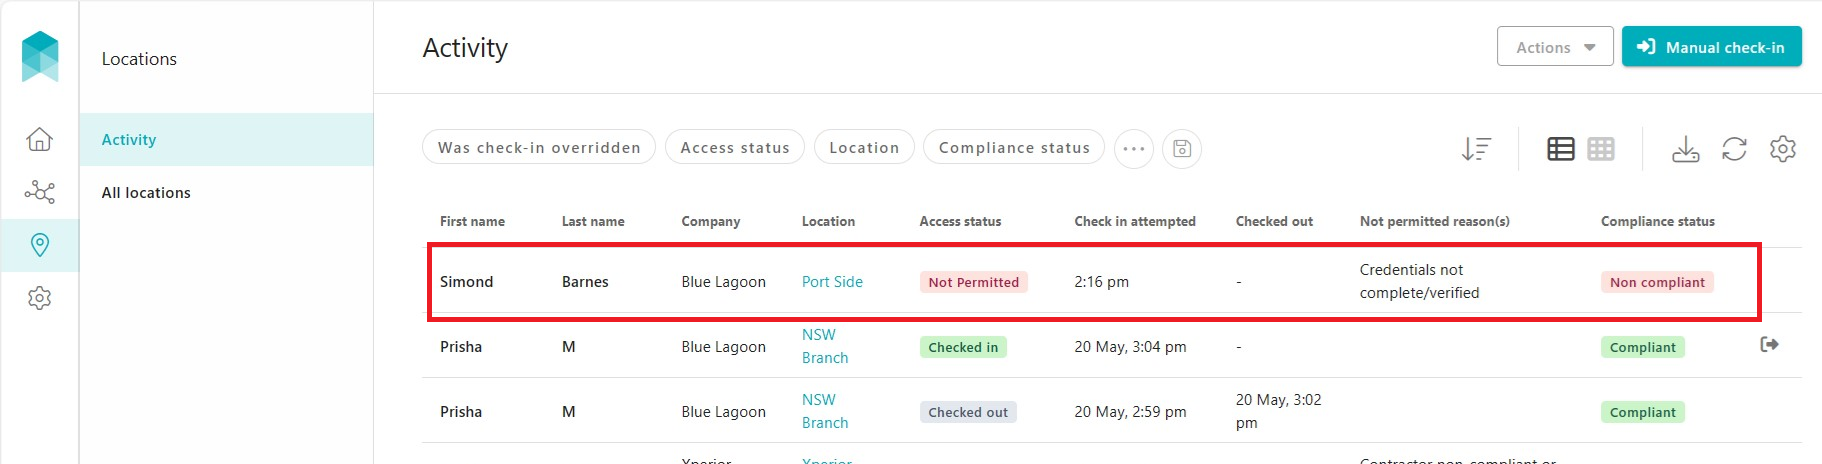
If a worker is non compliant, the check-in will be denied, and a not permitted access status will be indicated on the Activity page.
Client users can review the Not permitted reason(s), and if acceptable, provide a reason for the override and check-in the worker within 2 hours of the not permitted activity.
- From the Activity page, click on the not-permitted activity to view the details.
- If the not-permitted reason is acceptable, click Check in, provide a reason for overriding and then click OVERRIDE & CHECK-IN.
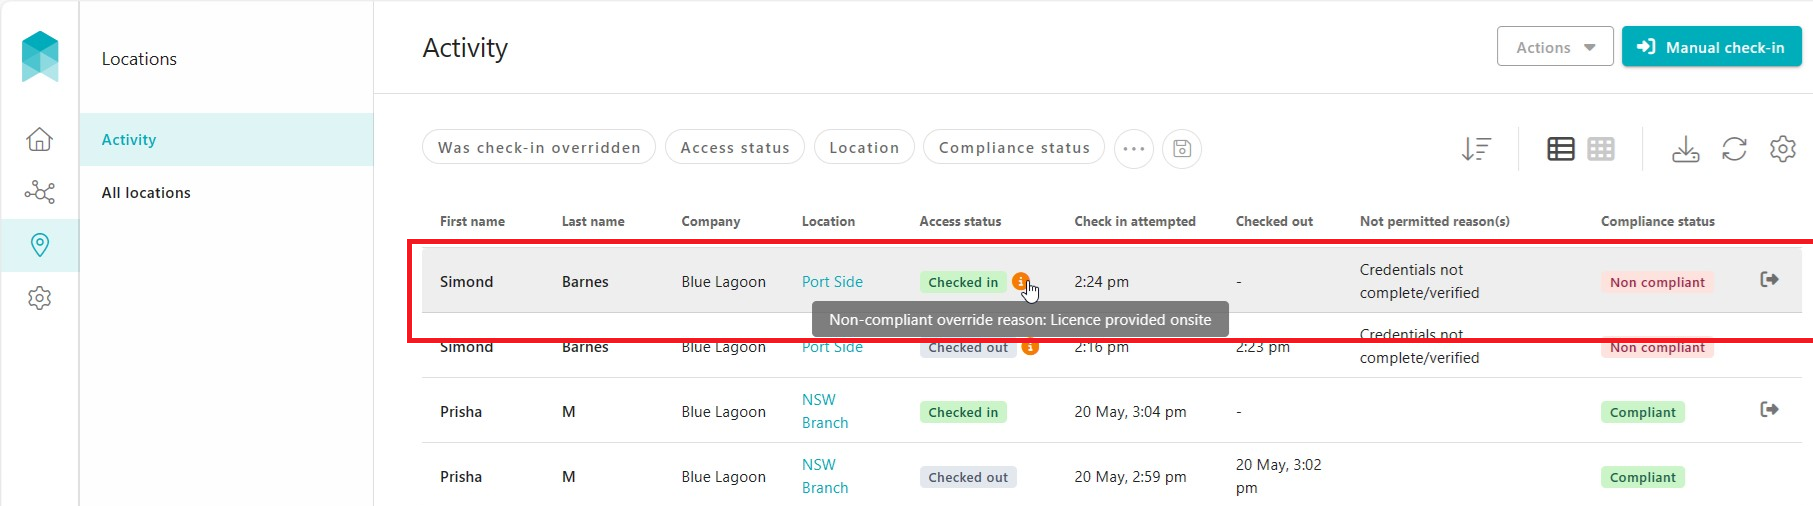
The Activity page will be updated to indicate the successful check-in of the worker. The information icon will appear to indicate that an override has occurred; hovering your mouse over the icon will reveal the reason for the override.